How I built my blog using SvelteKit and self-hosted Ghost CMS
I spent the last several days creating my personal website using SvelteKit and headless Ghost. I chose to go this route because I didn't like any of the themes Ghost provided. A few days ago, I wasn't familiar with terms like Content Management System (CMS) or Static Site Generator (SSG) so I'm fully aware of how difficult it can be to create a self-hosted blog. I'm hopeful I can save you some headache with this tutorial.
Requirements
This tutorial assumes you have a basic understanding of Svelte and SvelteKit, my current favorite technologies for building things on the web. I recommend going through this tutorial to quickly learn Svelte (it's the best programming tutorial I've encountered).
Svelte vs. SvelteKit
Svelte is a Javascript tool for building websites and web applications. SvelteKit is a framework for building things with Svelte that provides several nice things like server-side rendering (SSR), flexible routing, etc. You can read more about SvelteKit here.
Tutorial Overview
- Self-host Ghost on DigitalOcean
- Create a SvelteKit website that reads the contents of our Ghost blog
Step 1: Setting up Ghost on DigitalOcean
Ghost is a Content Management System (CMS) for publishing blogs. To oversimplify, a CMS is simply a platform that allows you to create a blog and manage your posts, all without code.
To set up and host your Ghost blog, you have two options: 1. pay for Ghost Pro to host it on a ghost.io domain or 2. host it yourself on some cloud platform (DigitalOcean, AWS, Google Cloud Platform, etc).
I'll be using DigitalOcean since I found it very easy to set Ghost up with and it only costs about $6 a month.
Step 1.1: Create a DigitalOcean account and create a Ghost droplet
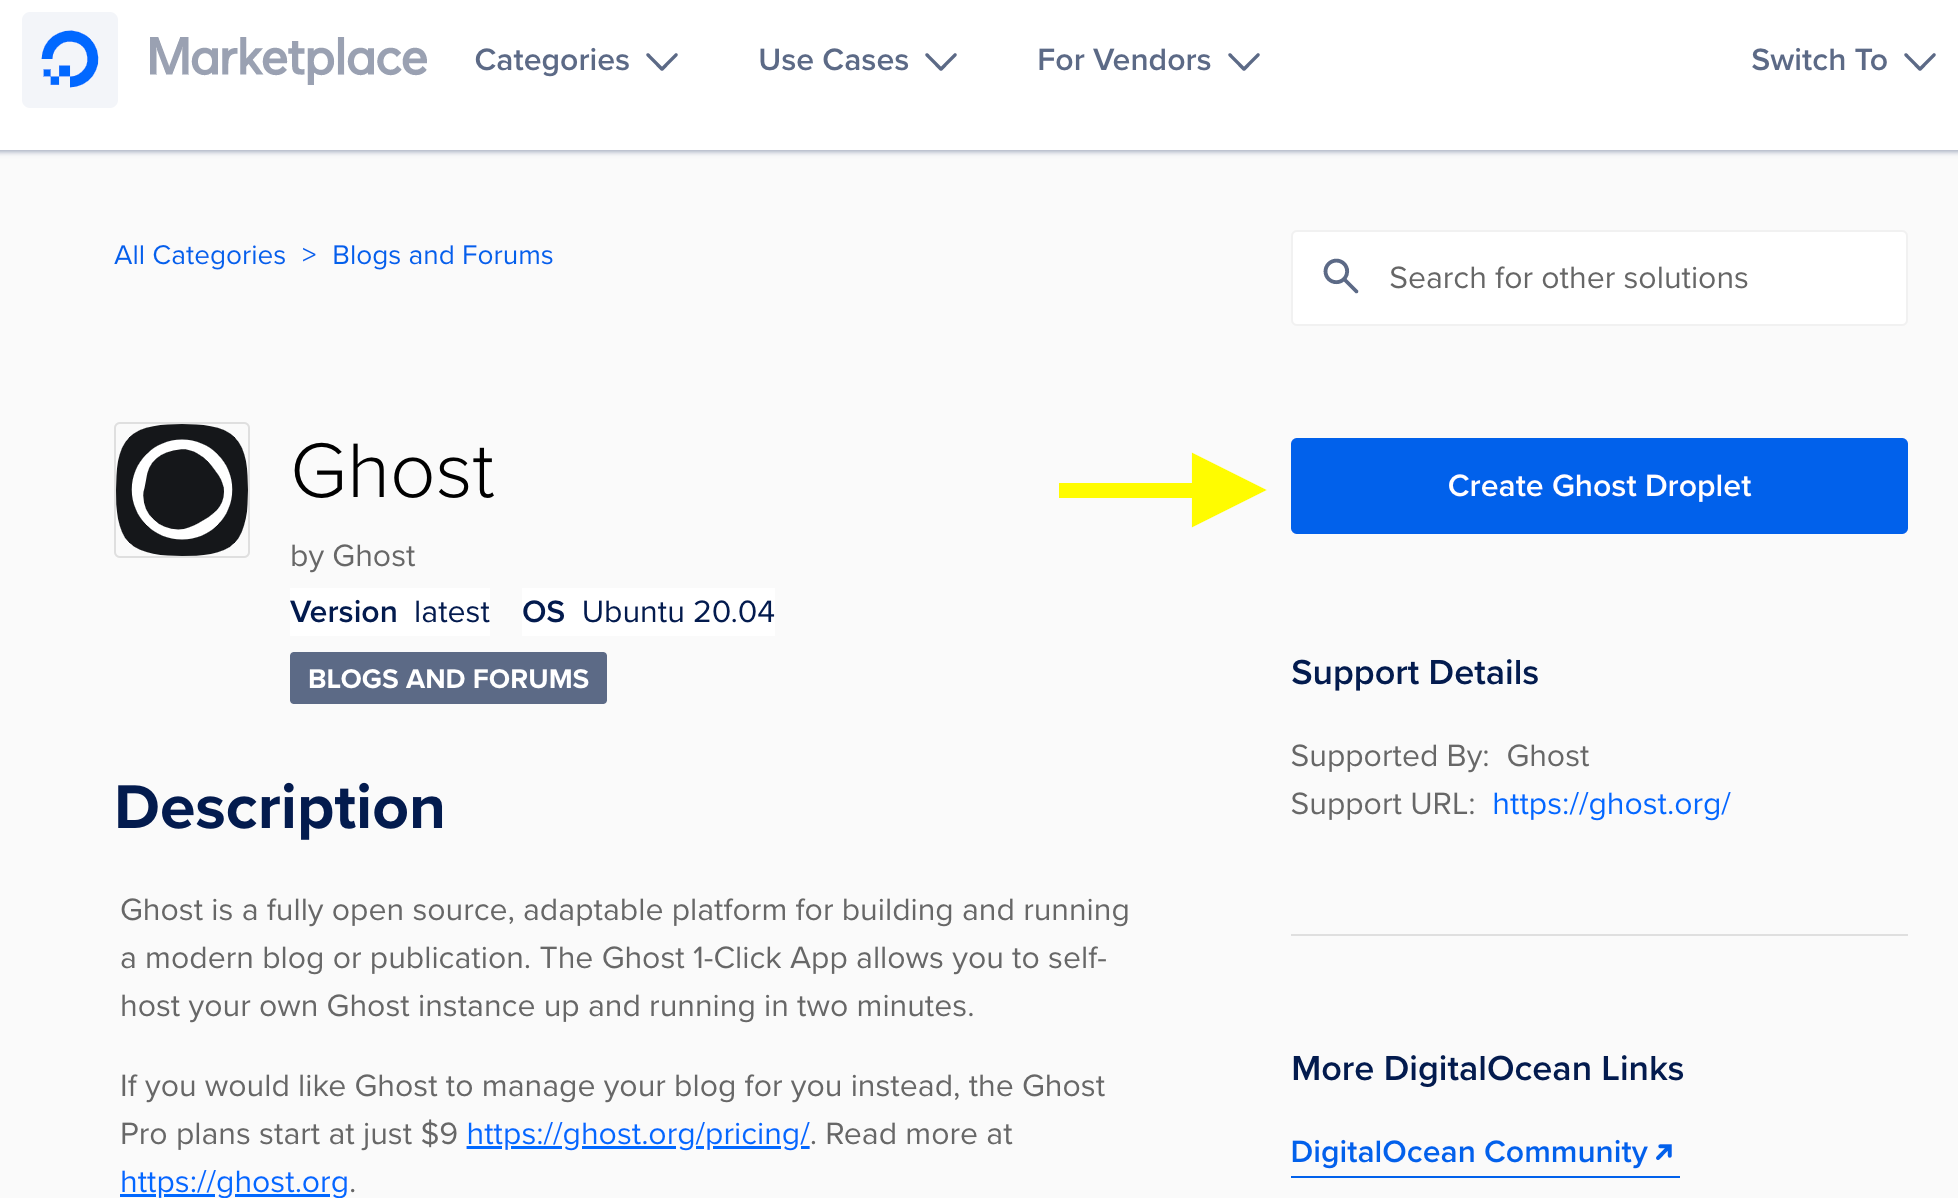
Sign-up or sign-in to your DigitalOcean account. Afterwards, head over to https://marketplace.digitalocean.com/apps/ghost and select "Create Ghost Droplet". A Droplet is just a virtual machine in the DigitalOcean ecosystem.
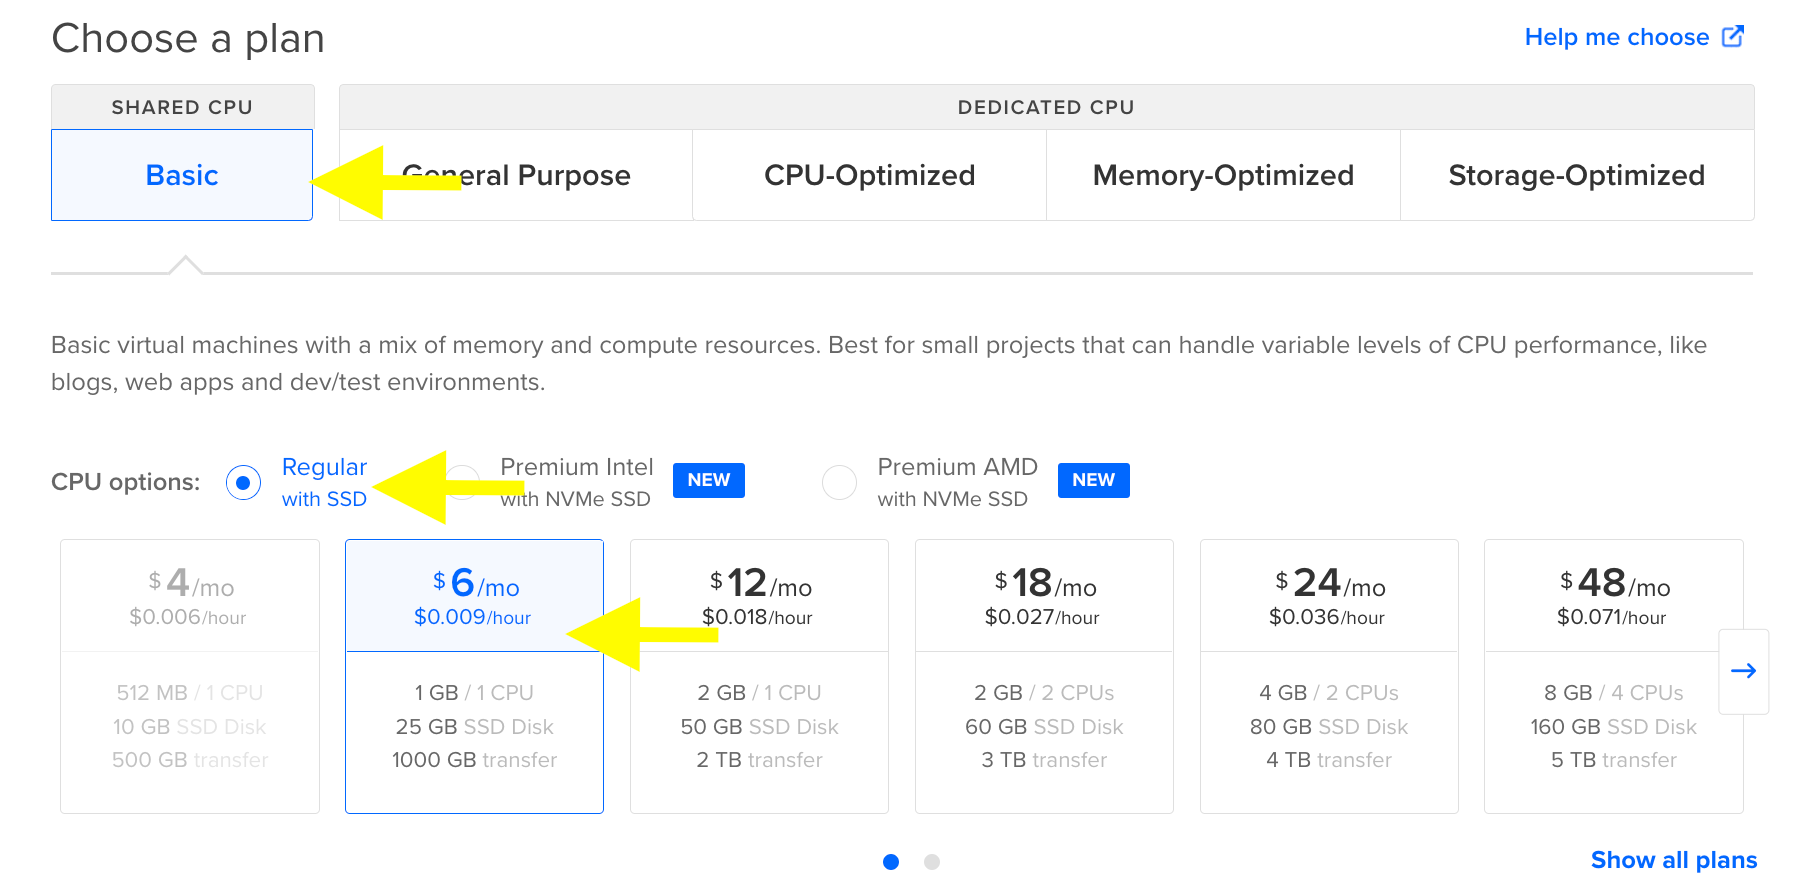
Once you're redirected to the "Create Droplets" page, scroll down to Choose a plan. If you want to stay cheap, select Shared CPU, then Regular with SSD, and finally the $6.0/mo option.
Scroll down to Authentication. Make sure Password is selected and create a root password.

Finally, scroll down and click Create Droplet.
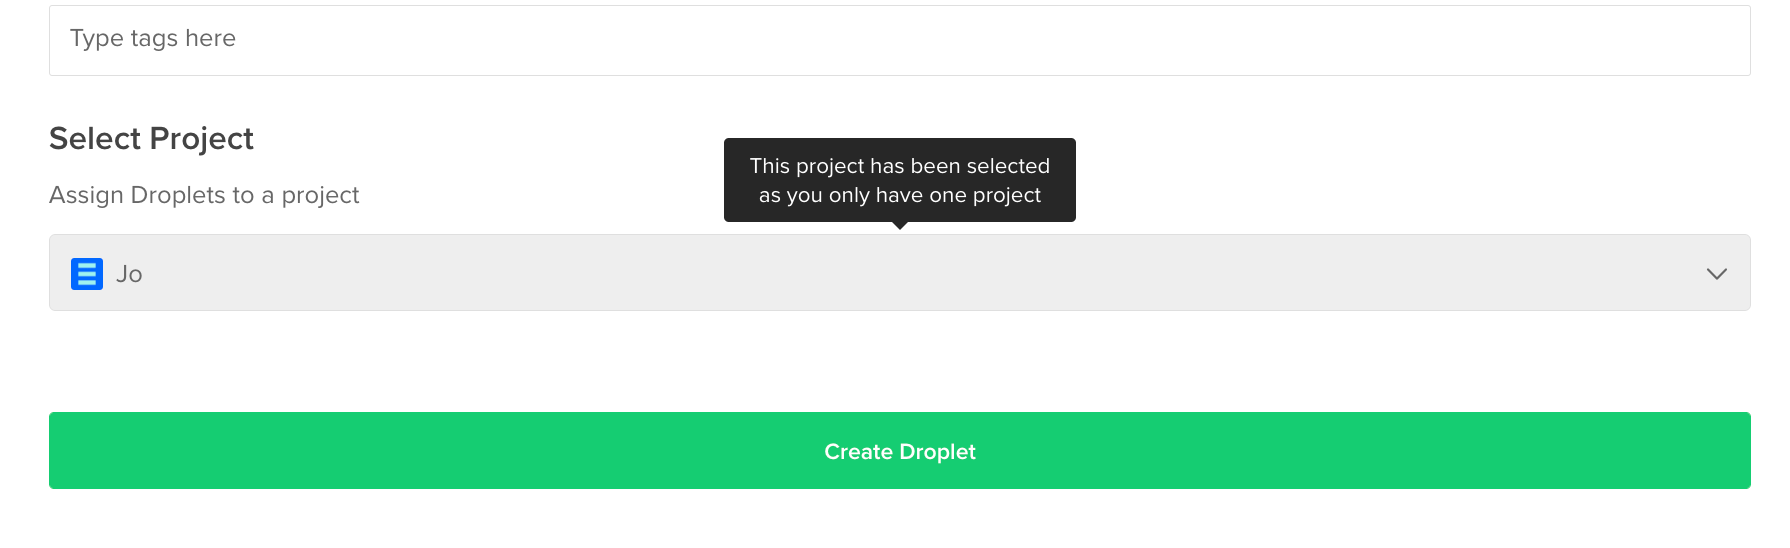
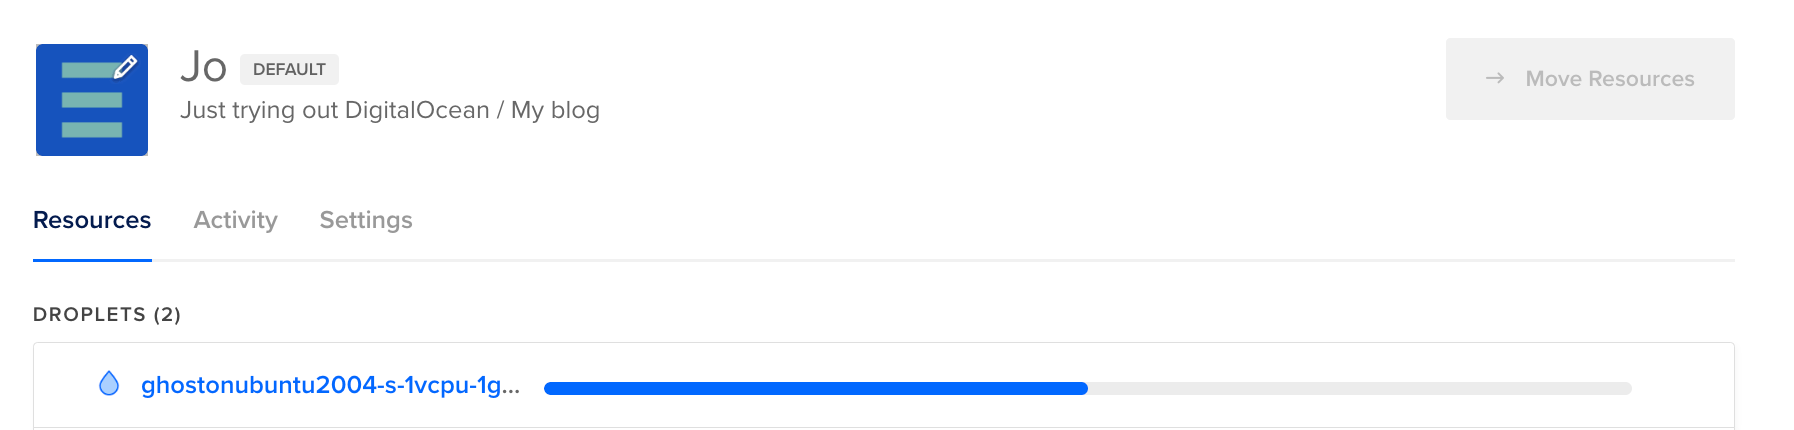
You'll be redirected to your projects page. Wait until your Droplet is fully created.
Step 1.2: Finish setting up your Ghost droplet
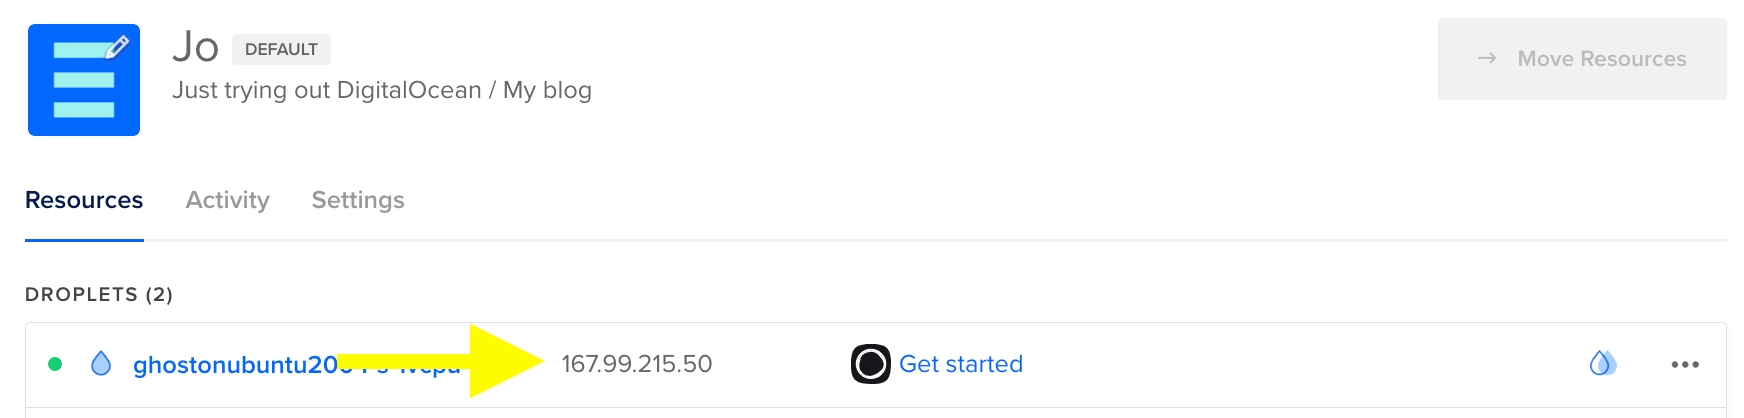
Once your Droplet is created, you'll see that there's an IP address associated with it. In my example, it's 167.99.215.50.
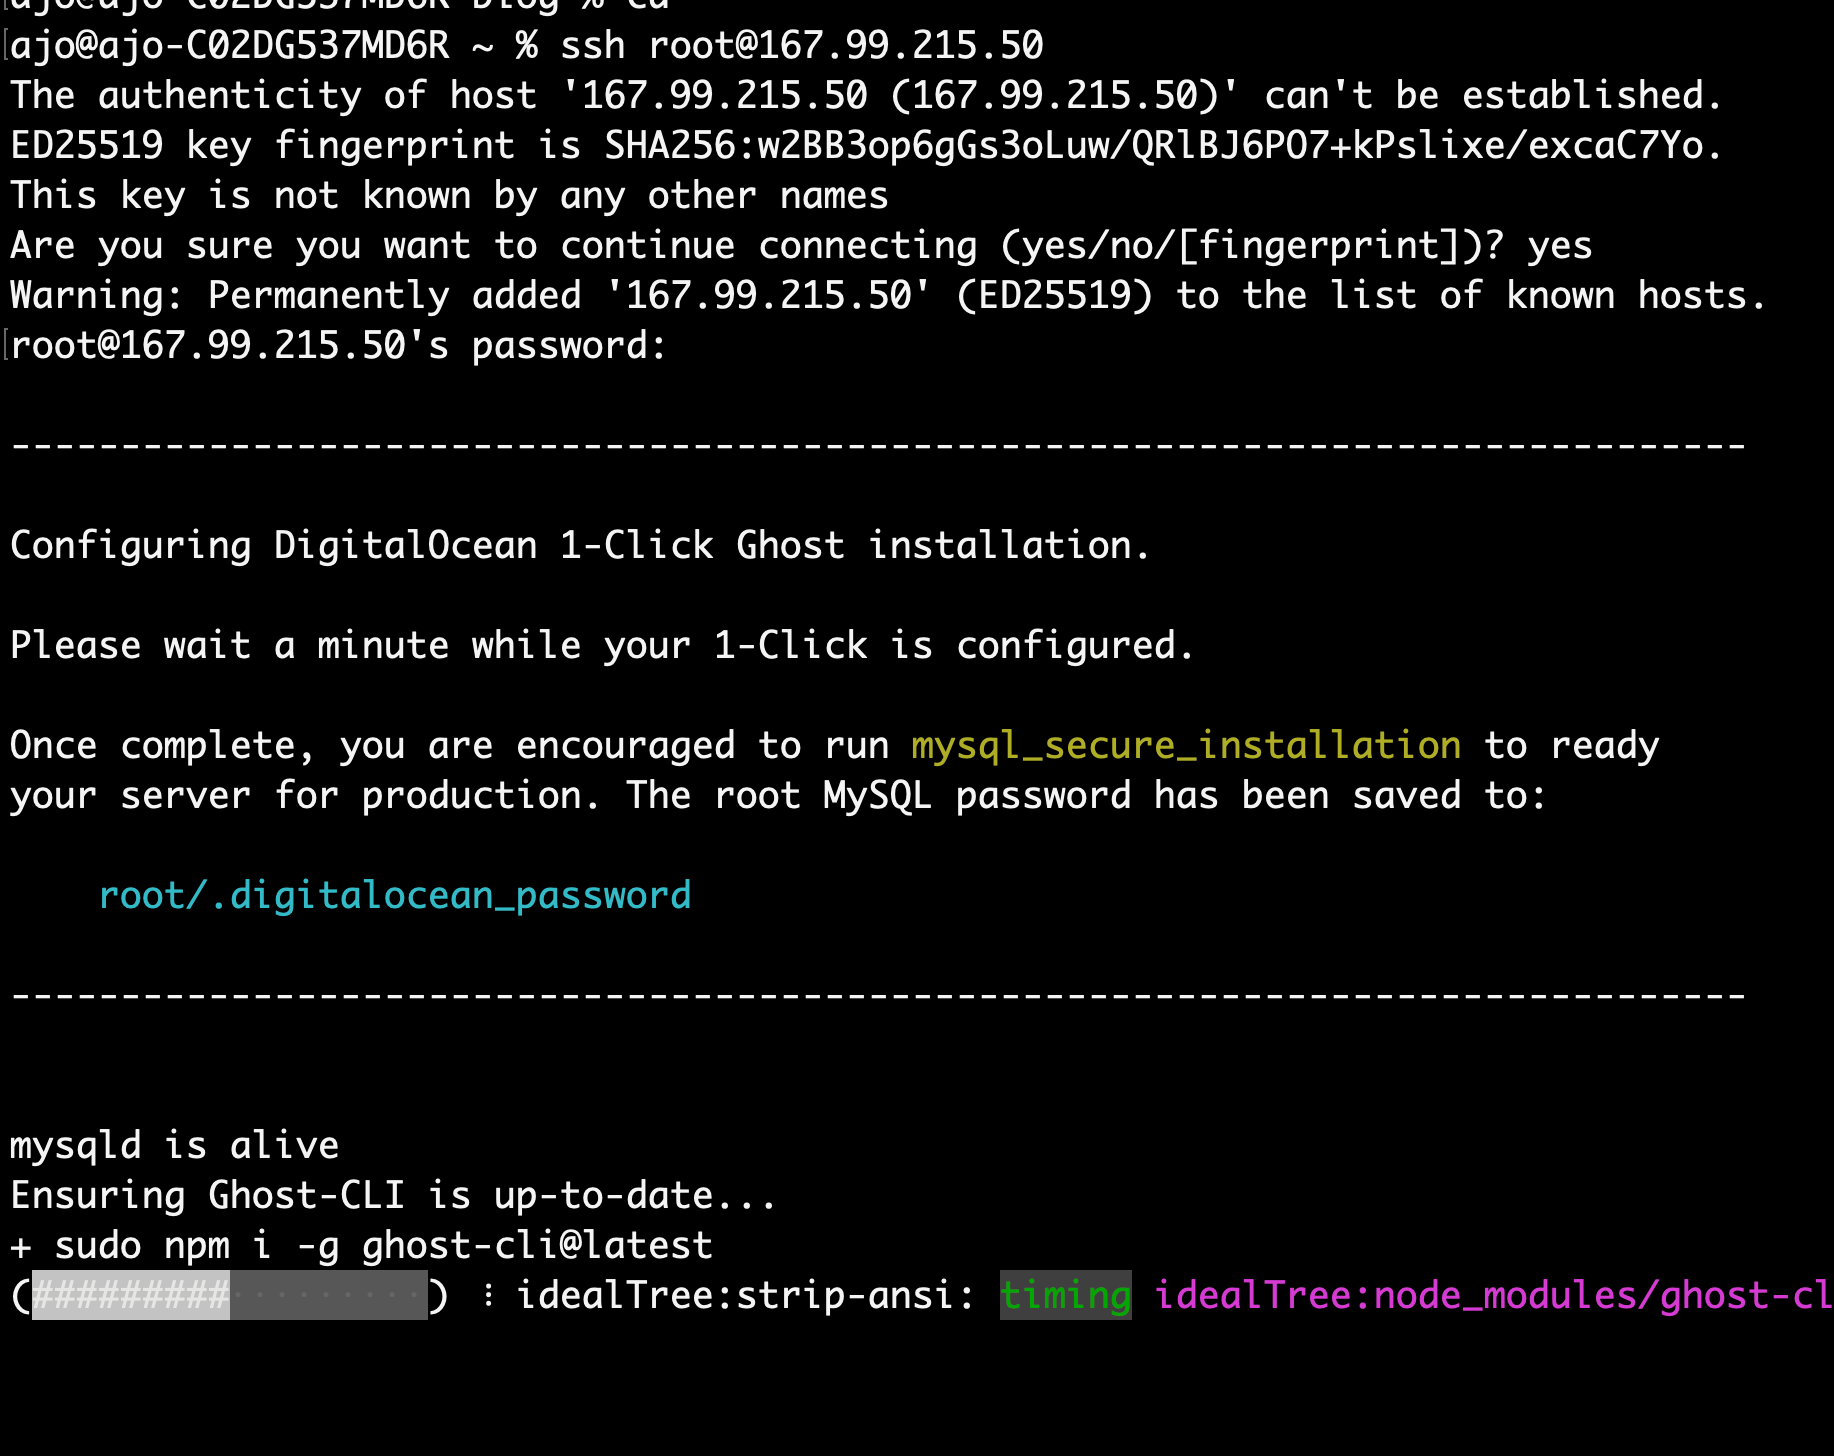
For the remaining steps of the setup, we'll need to use the terminal. Use ssh root@[Your Ghost Droplet IP] using your password from step 1.1. In my example, I'll be using ssh root@167.99.215.50. Once you ssh in, wait for Ghost to finish installing, which takes about 5 minutes.
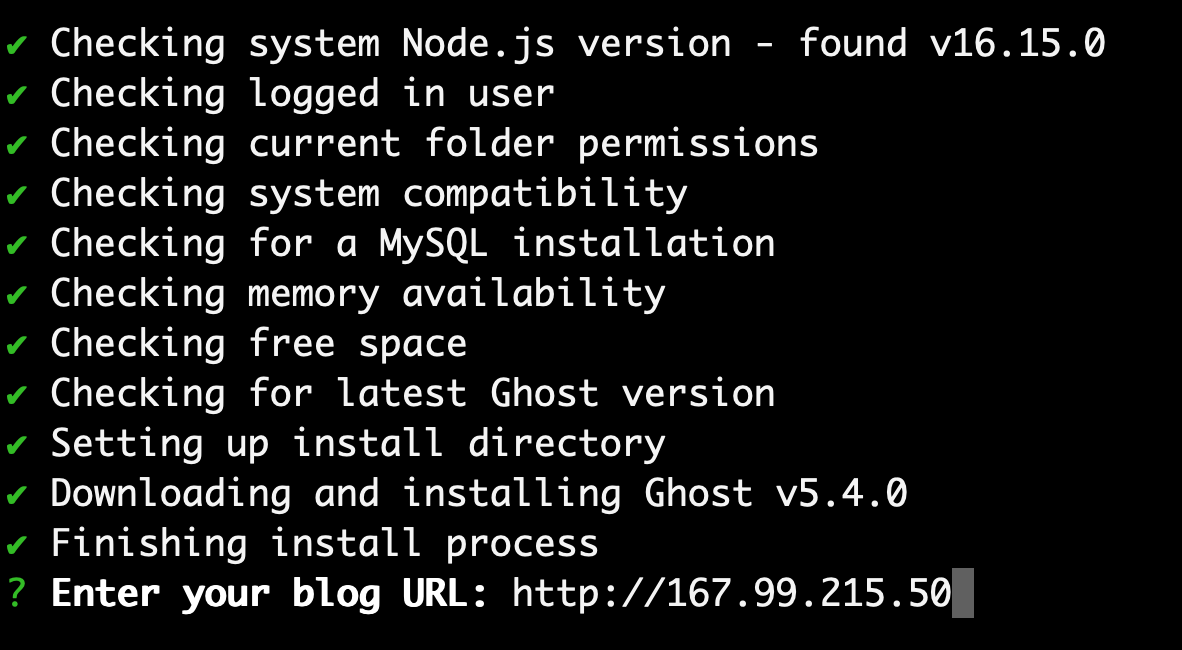
Once the installation finishes, you will be prompted with Enter your blog URL. If you have your domain, enter it here. Otherwise, enter http://[Your Ghost Droplet IP] (if you later want to change it to your domain, follow these instructions). I'll be setting my url to http://167.99.215.50.
Remember to use http and not https for this example.
Now if I head over to http://167.99.215.50/ghost, a welcome page appears.
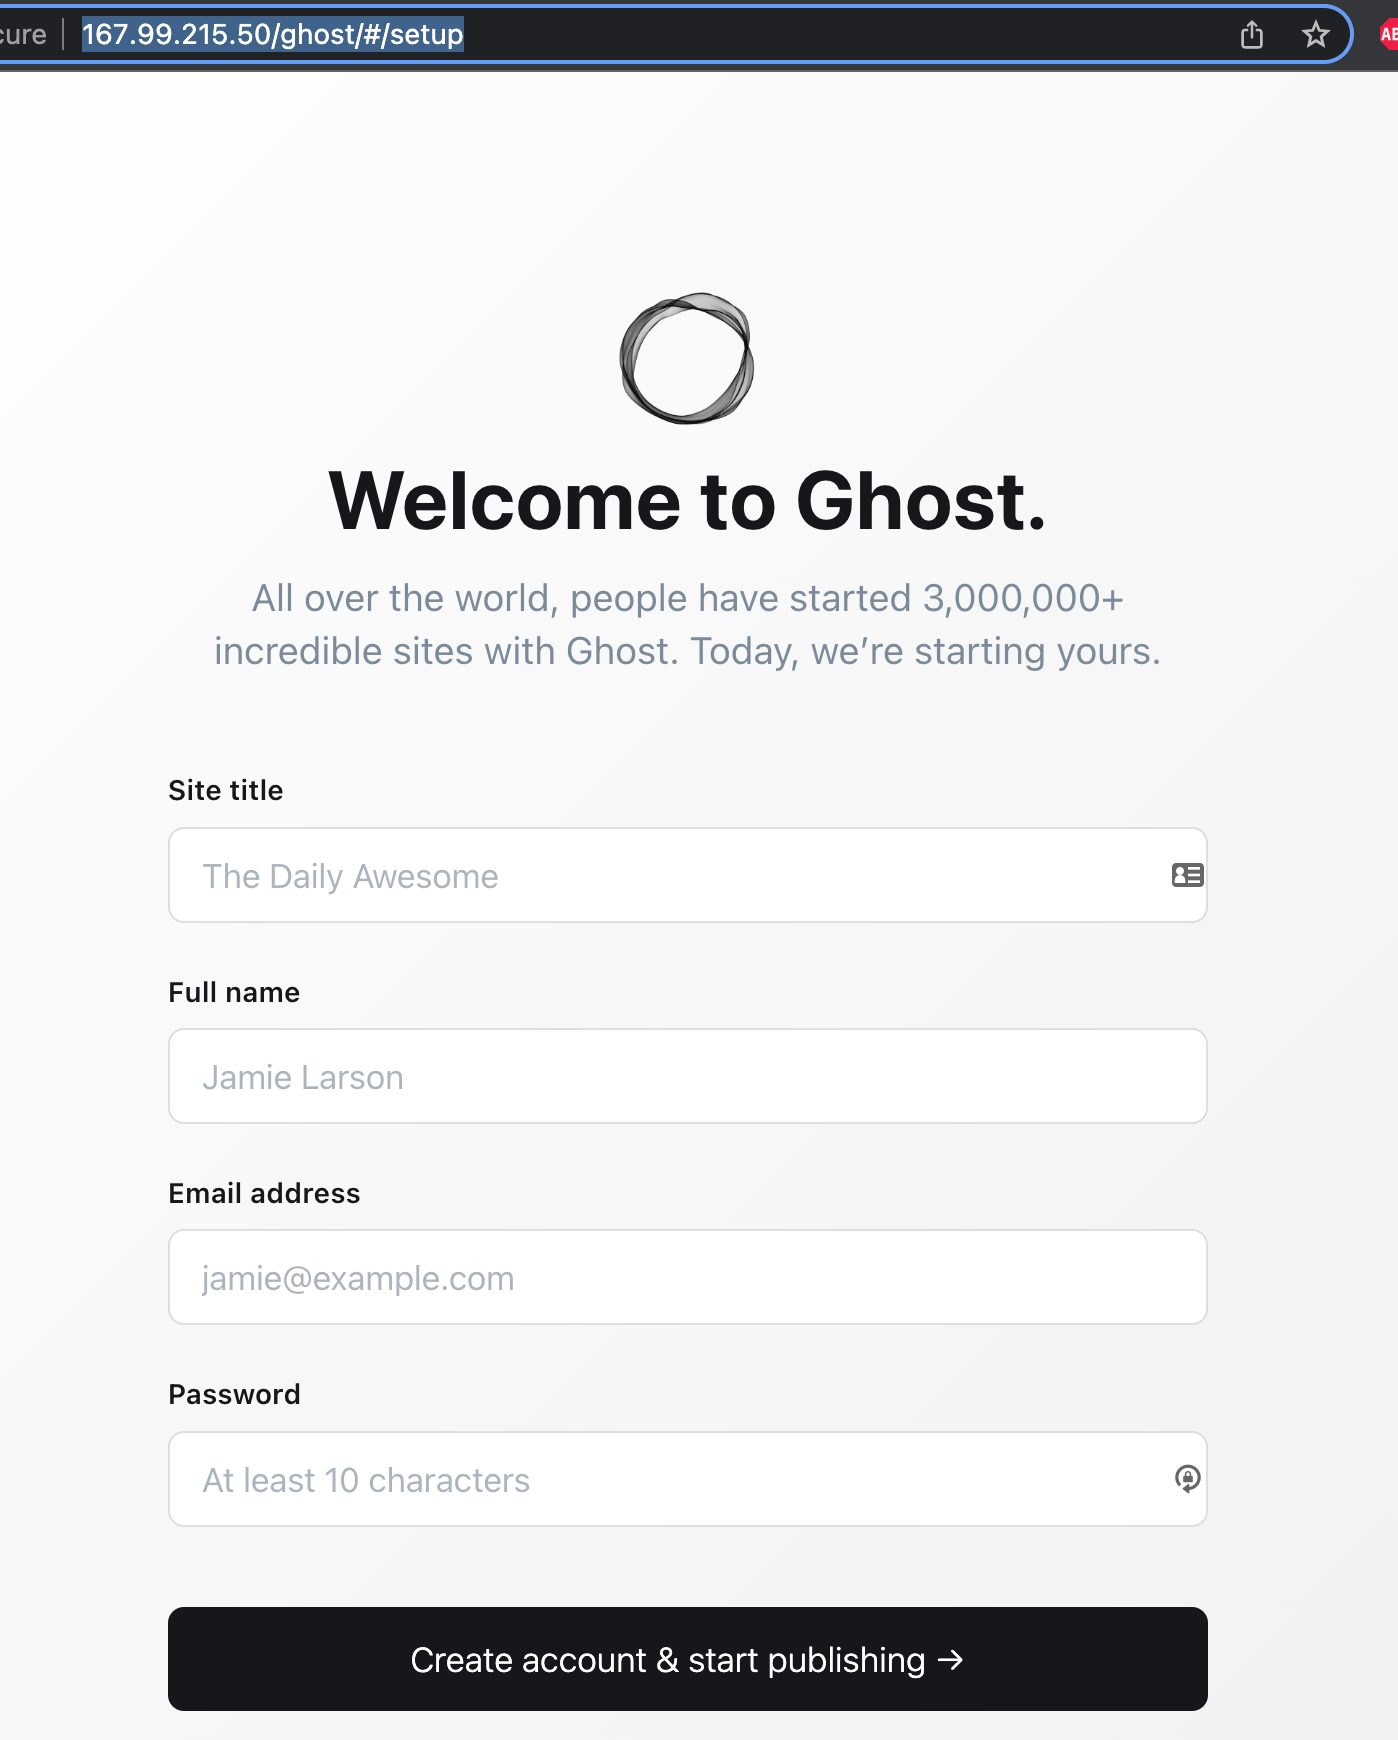
Fill out the form and click Create account & start publishing. Your Ghost instance is fully up and running!
Step 1.3: Updating Ghost so our SvelteKit site can fetch our blog posts
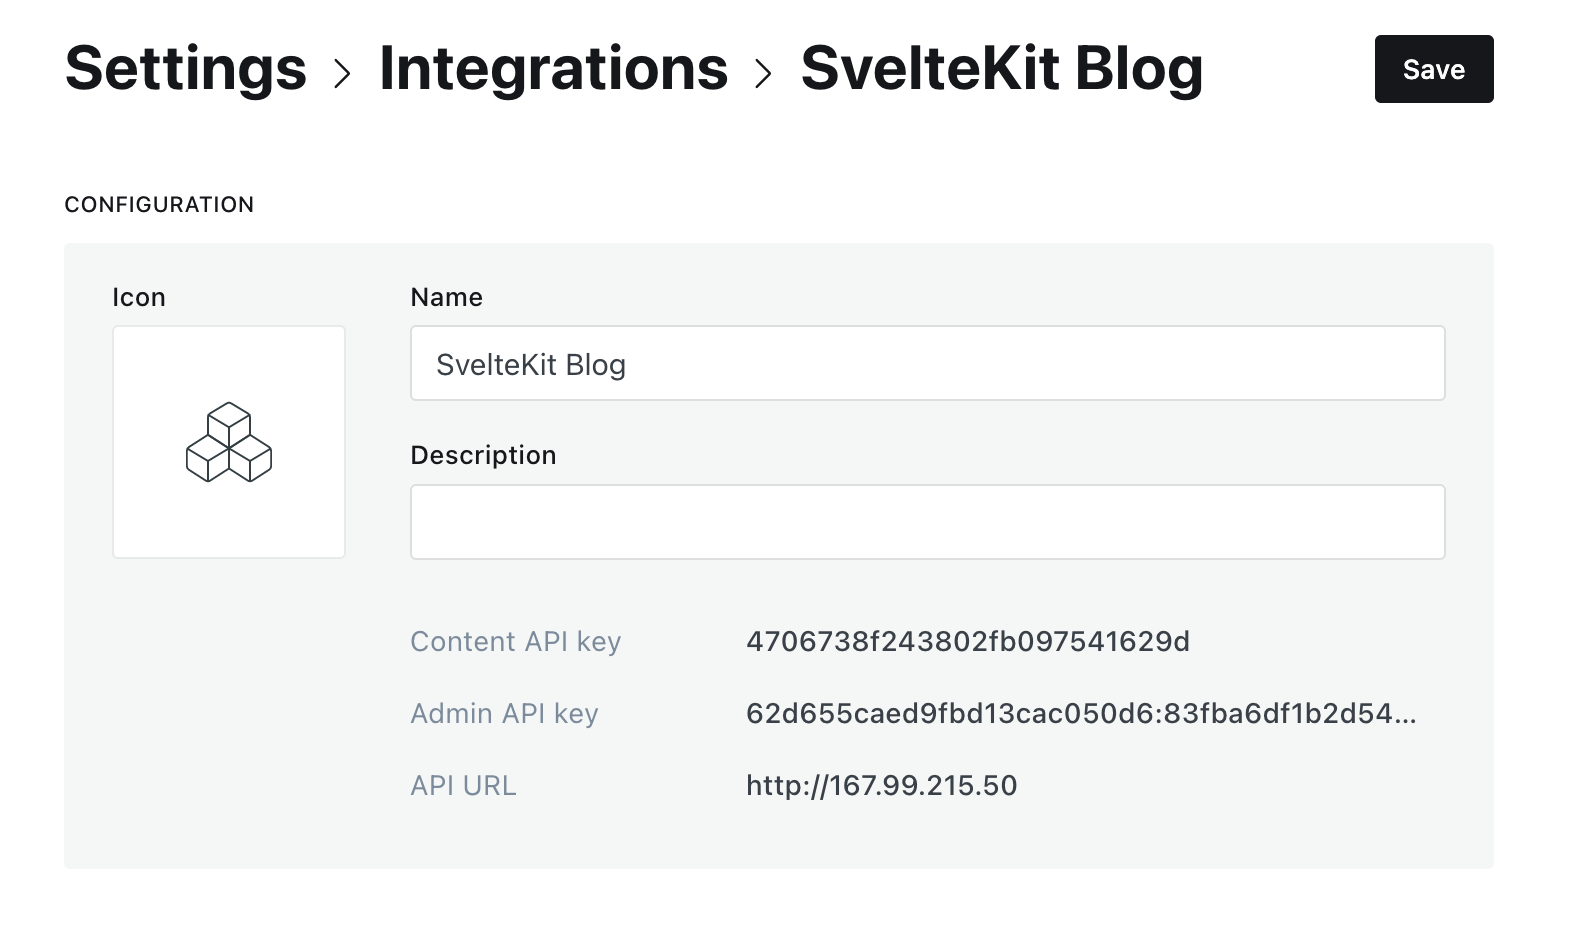
Go to settings → integrations (or navigate to http://[Your Ghost Droplet IP]/ghost/#/settings/integrations) and click Add custom integration. Choose whatever name you want (I chose "SvelteKit Blog").
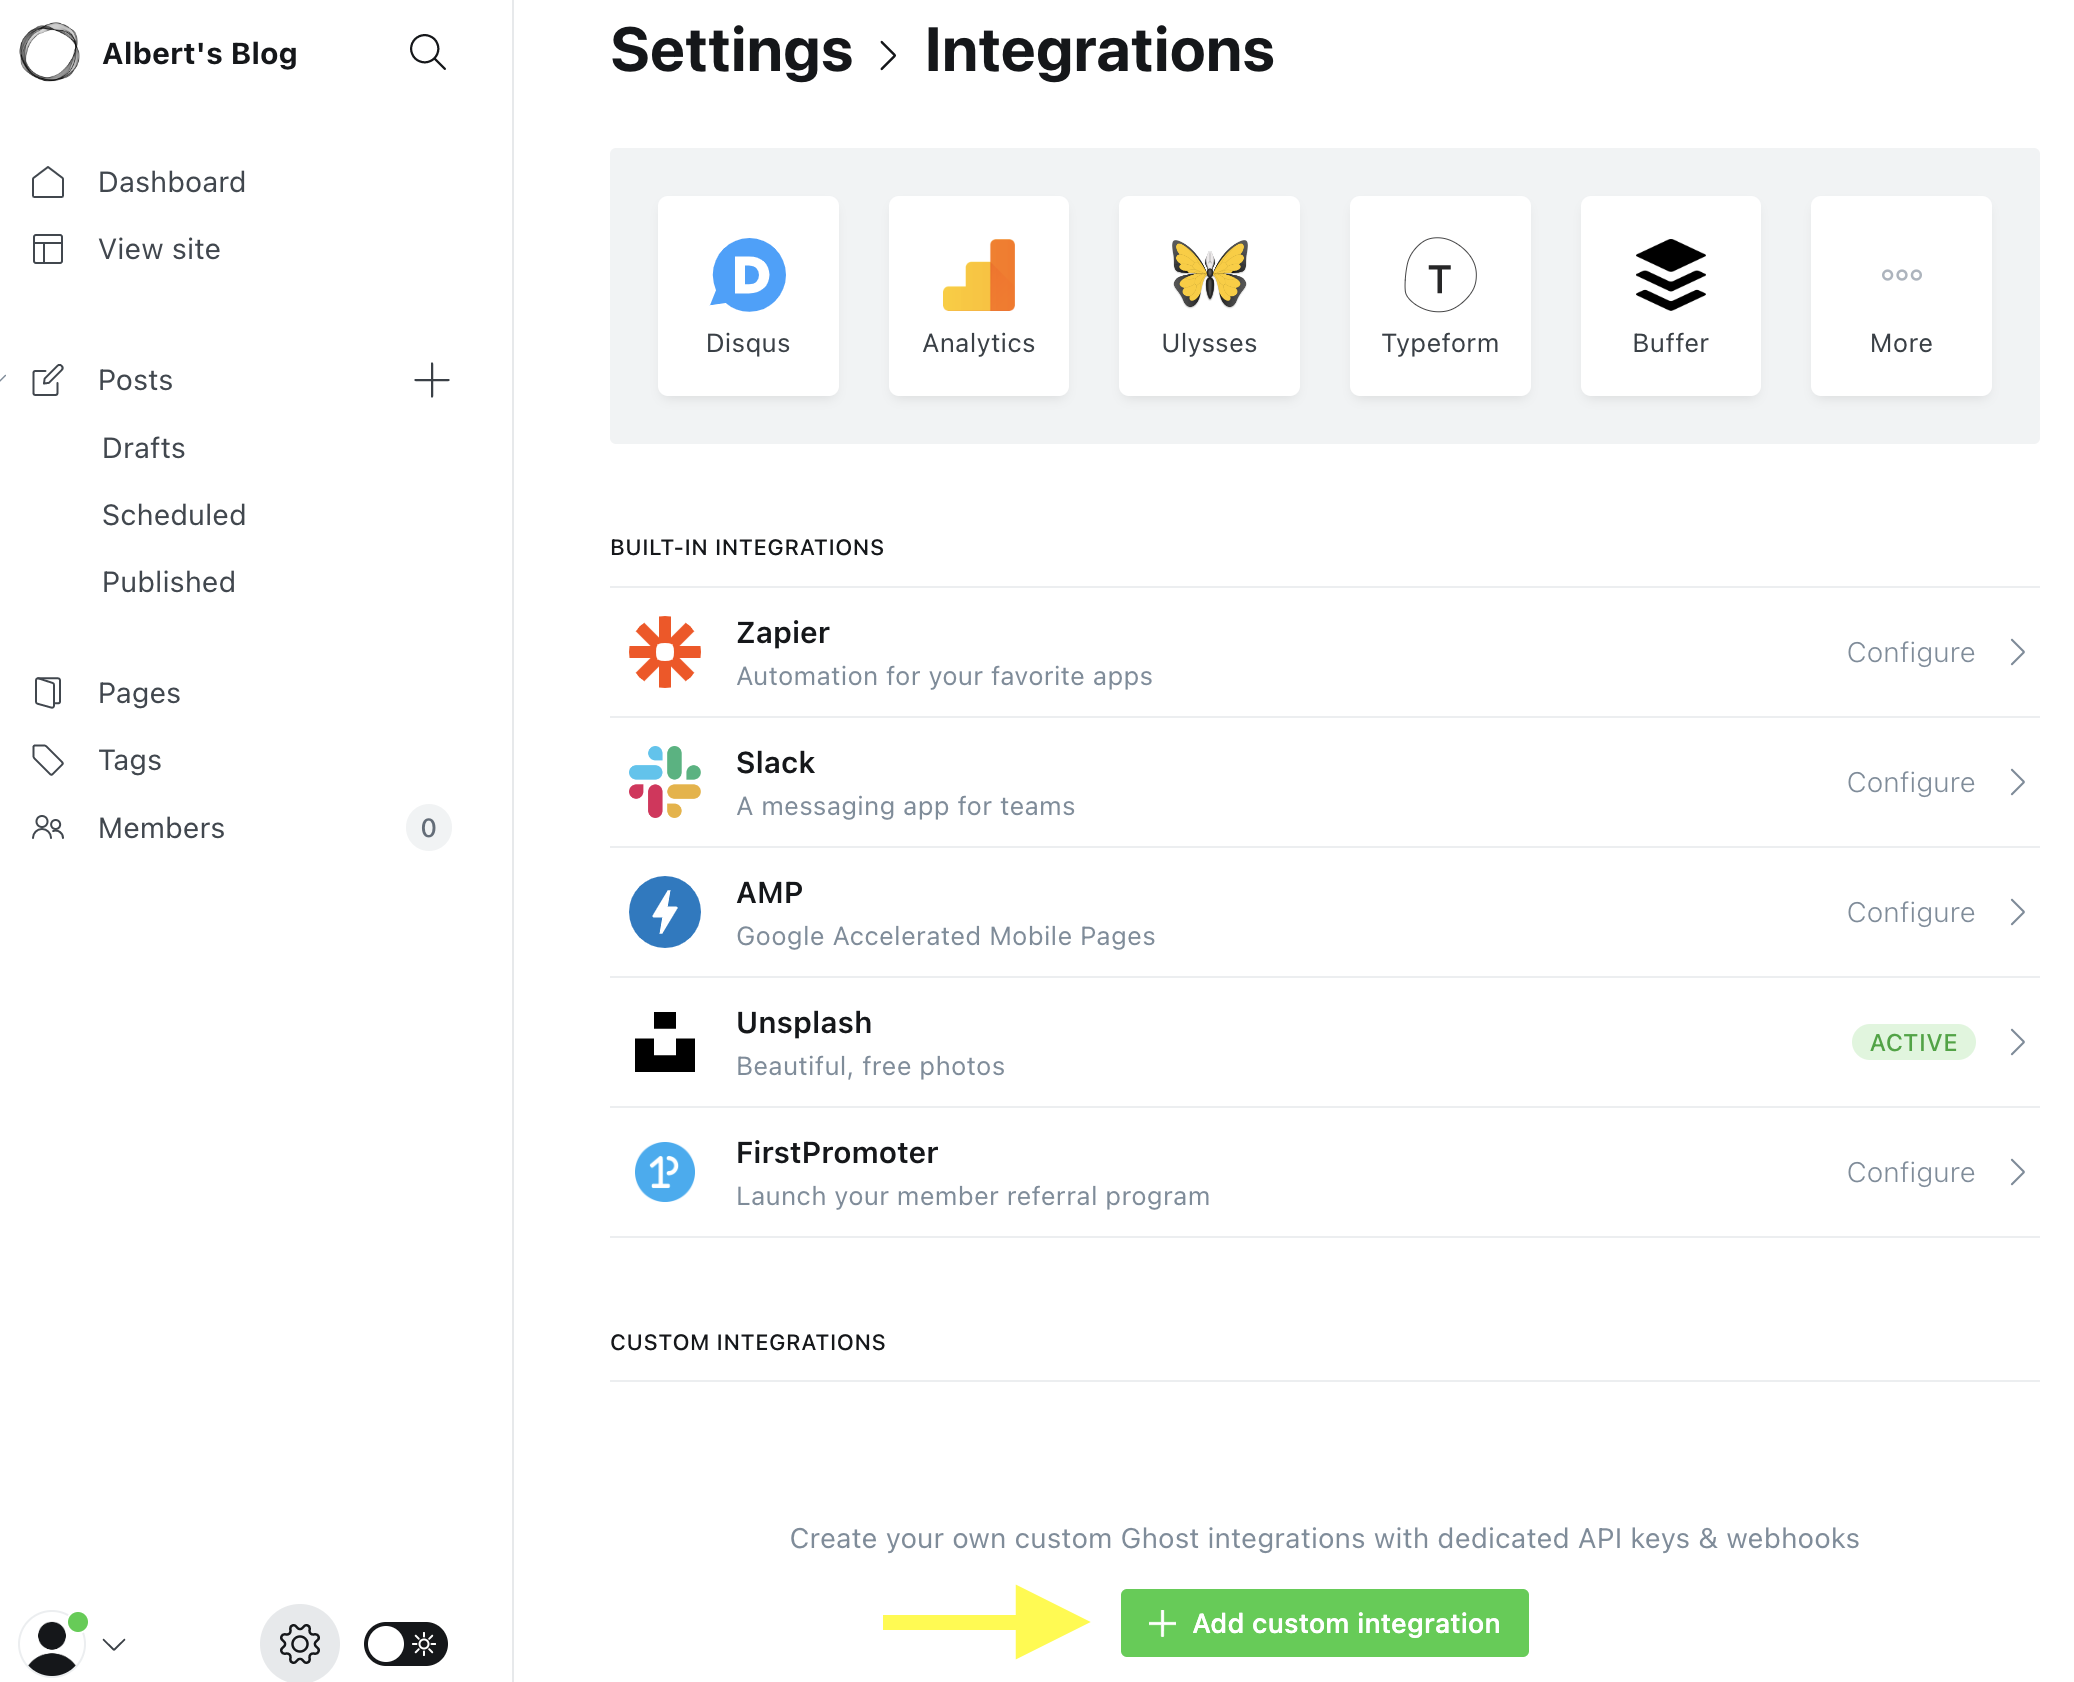
We'll be using Content API Key to later fetch posts from our Ghost blog. Mine is 4706738f243802fb097541629d.
Step 2: Create our SvelteKit website
Step 2.1: Set up SvelteKit skeleton project and install @tryghost/content-api
I'll be using my-blog as my SvelteKit project. Open your terminal and run:
npm create svelte@latest my-blog
When prompted with configurations, select the following:
Which Svelte app template? › Skeleton project
Add type checking with TypeScript? › Yes, using JavaScript with JSDoc comments
Add ESLint for code linting? … No
Add Prettier for code formatting? … No
Add Playwright for browser testing? … No
After, run the following to finish setting up your project.
cd my-blog
npm install
npm i @tryghost/content-api
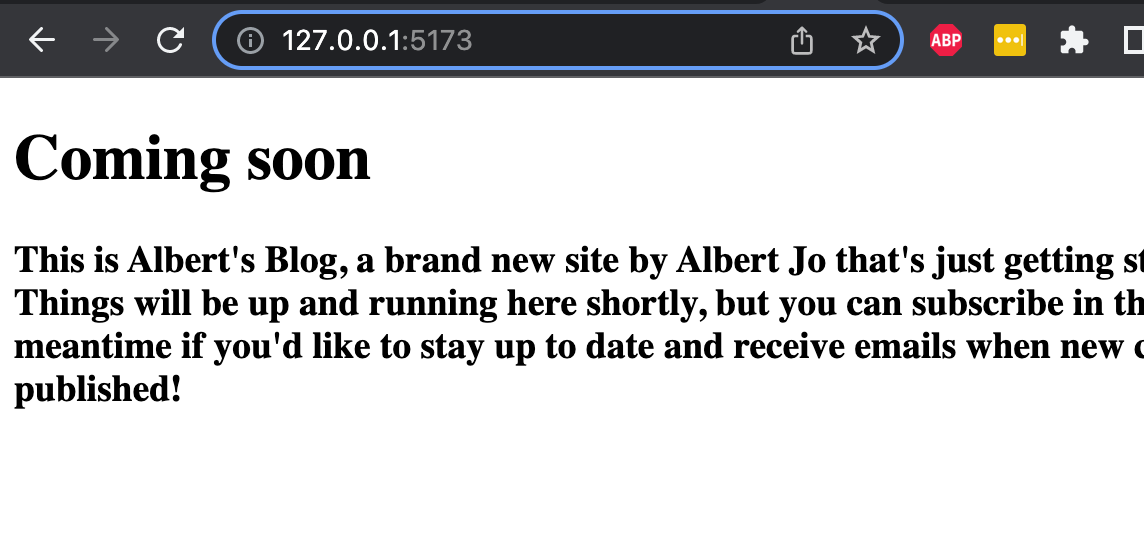
npm run devNow if you go to http://127.0.0.1:5174/ (or some other port) on your browser, you'll see that your SvelteKit website is up and running.

Step 2.1: Update index.svelte
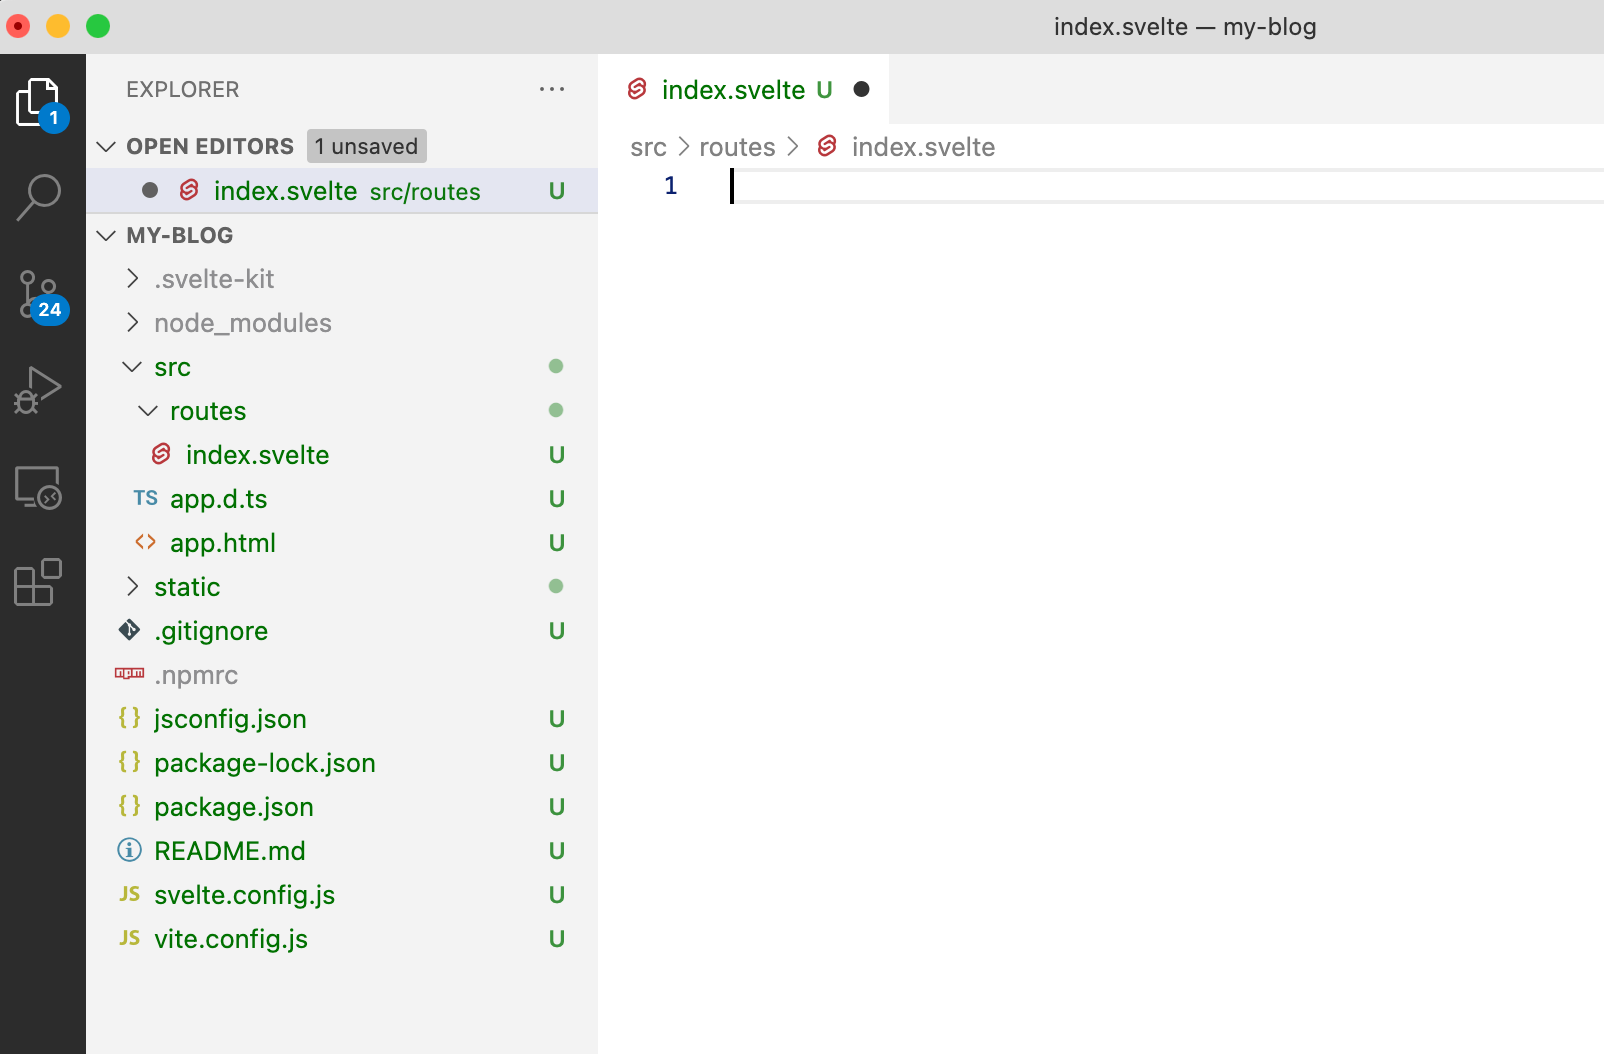
Open your project in Visual Studios Code and open src/routes/index.svelte and remove its content.
Replace it with the following to retrieve our posts from our Ghost instance. Remember to replace GHOST_URL and GHOST_KEY.
<script context='module'>
  import GhostContentAPI from '@tryghost/content-api';

  const GHOST_URL = 'http://[YOUR GHOST DROPLET IP]';
  const GHOST_KEY = '[YOUR CONTENT API KEY FROM STEP 1.3]';
  const GHOST_VERSION = 'v4';

  export async function load() {
    const api = GhostContentAPI({
        url: GHOST_URL,
        key: GHOST_KEY,
        version: GHOST_VERSION})
    const postsJson = await api.posts.browse({limit: 5, include: 'tags,authors'});

    return {
      props: {
        postsJson: postsJson
      }
    }
  }
</script>

<script>
  export let postsJson
</script>Now we can access our posts with postsJson. We can use Svelte's #each directive to dynamically show each post. After the last </script> tag, add:
{#each postsJson as post}
  <h1> {post.title} </h1>
  <h3> {post.excerpt} </h3>
{/each}Refresh your browser, and you should see the titles and excerpts of our blog posts.
And we're done! Here's my Index.svelte if you run into any issues.
<script context='module'>
  import GhostContentAPI from '@tryghost/content-api';

  const GHOST_URL = 'http://167.99.215.50';
  const GHOST_KEY = '4706738f243802fb097541629d';
  const GHOST_VERSION = 'v4';

  export async function load() {
    const api = GhostContentAPI({
        url: GHOST_URL,
        key: GHOST_KEY,
        version: GHOST_VERSION})
    const postsJson = await api.posts.browse({limit: 5, include: 'tags,authors'});
    console.log(postsJson);
    return {
      props: {
        postsJson: postsJson
      }
    }
  }
</script>

<script>
  export let postsJson
</script>

{#each postsJson as post}
  <h1> {post.title} </h1>
  <h3> {post.excerpt} </h3>
{/each}If you want to learn more
To learn more about Svelte and SvelteKit, check out their official documentation.
If you want to change your Ghost droplet's domain on Digital Ocean, I found this video to be helpful.
Also, Brayden Girard's video is a great resource for learning how to build a blog with SvelteKit + Headless Ghost CMS.